Embedded Linux Dropbox
July 3, 2013
Overview
A private Dropbox alternative with no subscription fees or reliance on the cloud. It runs an internet-connected embedded Linux server and offers as much storage as you plug into it. Turn your old hard drives into personal cloud storage!
Time Invested: 2 days
Cost (BeagleBone Black): Free from trade show ($55 new)
Cost (Hard Drive): Collecting dust ($120 new)
Features:
- Personal cloud storage
- File sharing and sync
- Document editor
- Media player
Gallery
Details
Despite ever increasing storage capacity, cloud storage remains prohibitively expensive for large amounts of data. The price to store a lifetime of accumulated photos and videos in the cloud, say 1-2 TB, is about the same as buying a new 2 TB hard drive every year. That’s more than a little steep considering that hard drives tend to last me 5-7 years and last 3 years in data centers. Moreover, the rise of single-board computers has made it dirt cheap to set up your own web server.
Solution: Build a low power, embedded Linux dropbox!
ownCloud is an open source cloud storage solution. It’s well designed, regularly updated, and most importantly free. Sure, setting up an FTP server technically qualifies as building a dropbox, but it lacks nearly all of the features that make commercial services like Dropbox so great. If you want a web interface, a built-in document editor, a media player, and the ability to share files with others using publicly accessible links, ownCloud is the way to go. It's a true Dropbox replacement with even more features than its expensive counterpart.
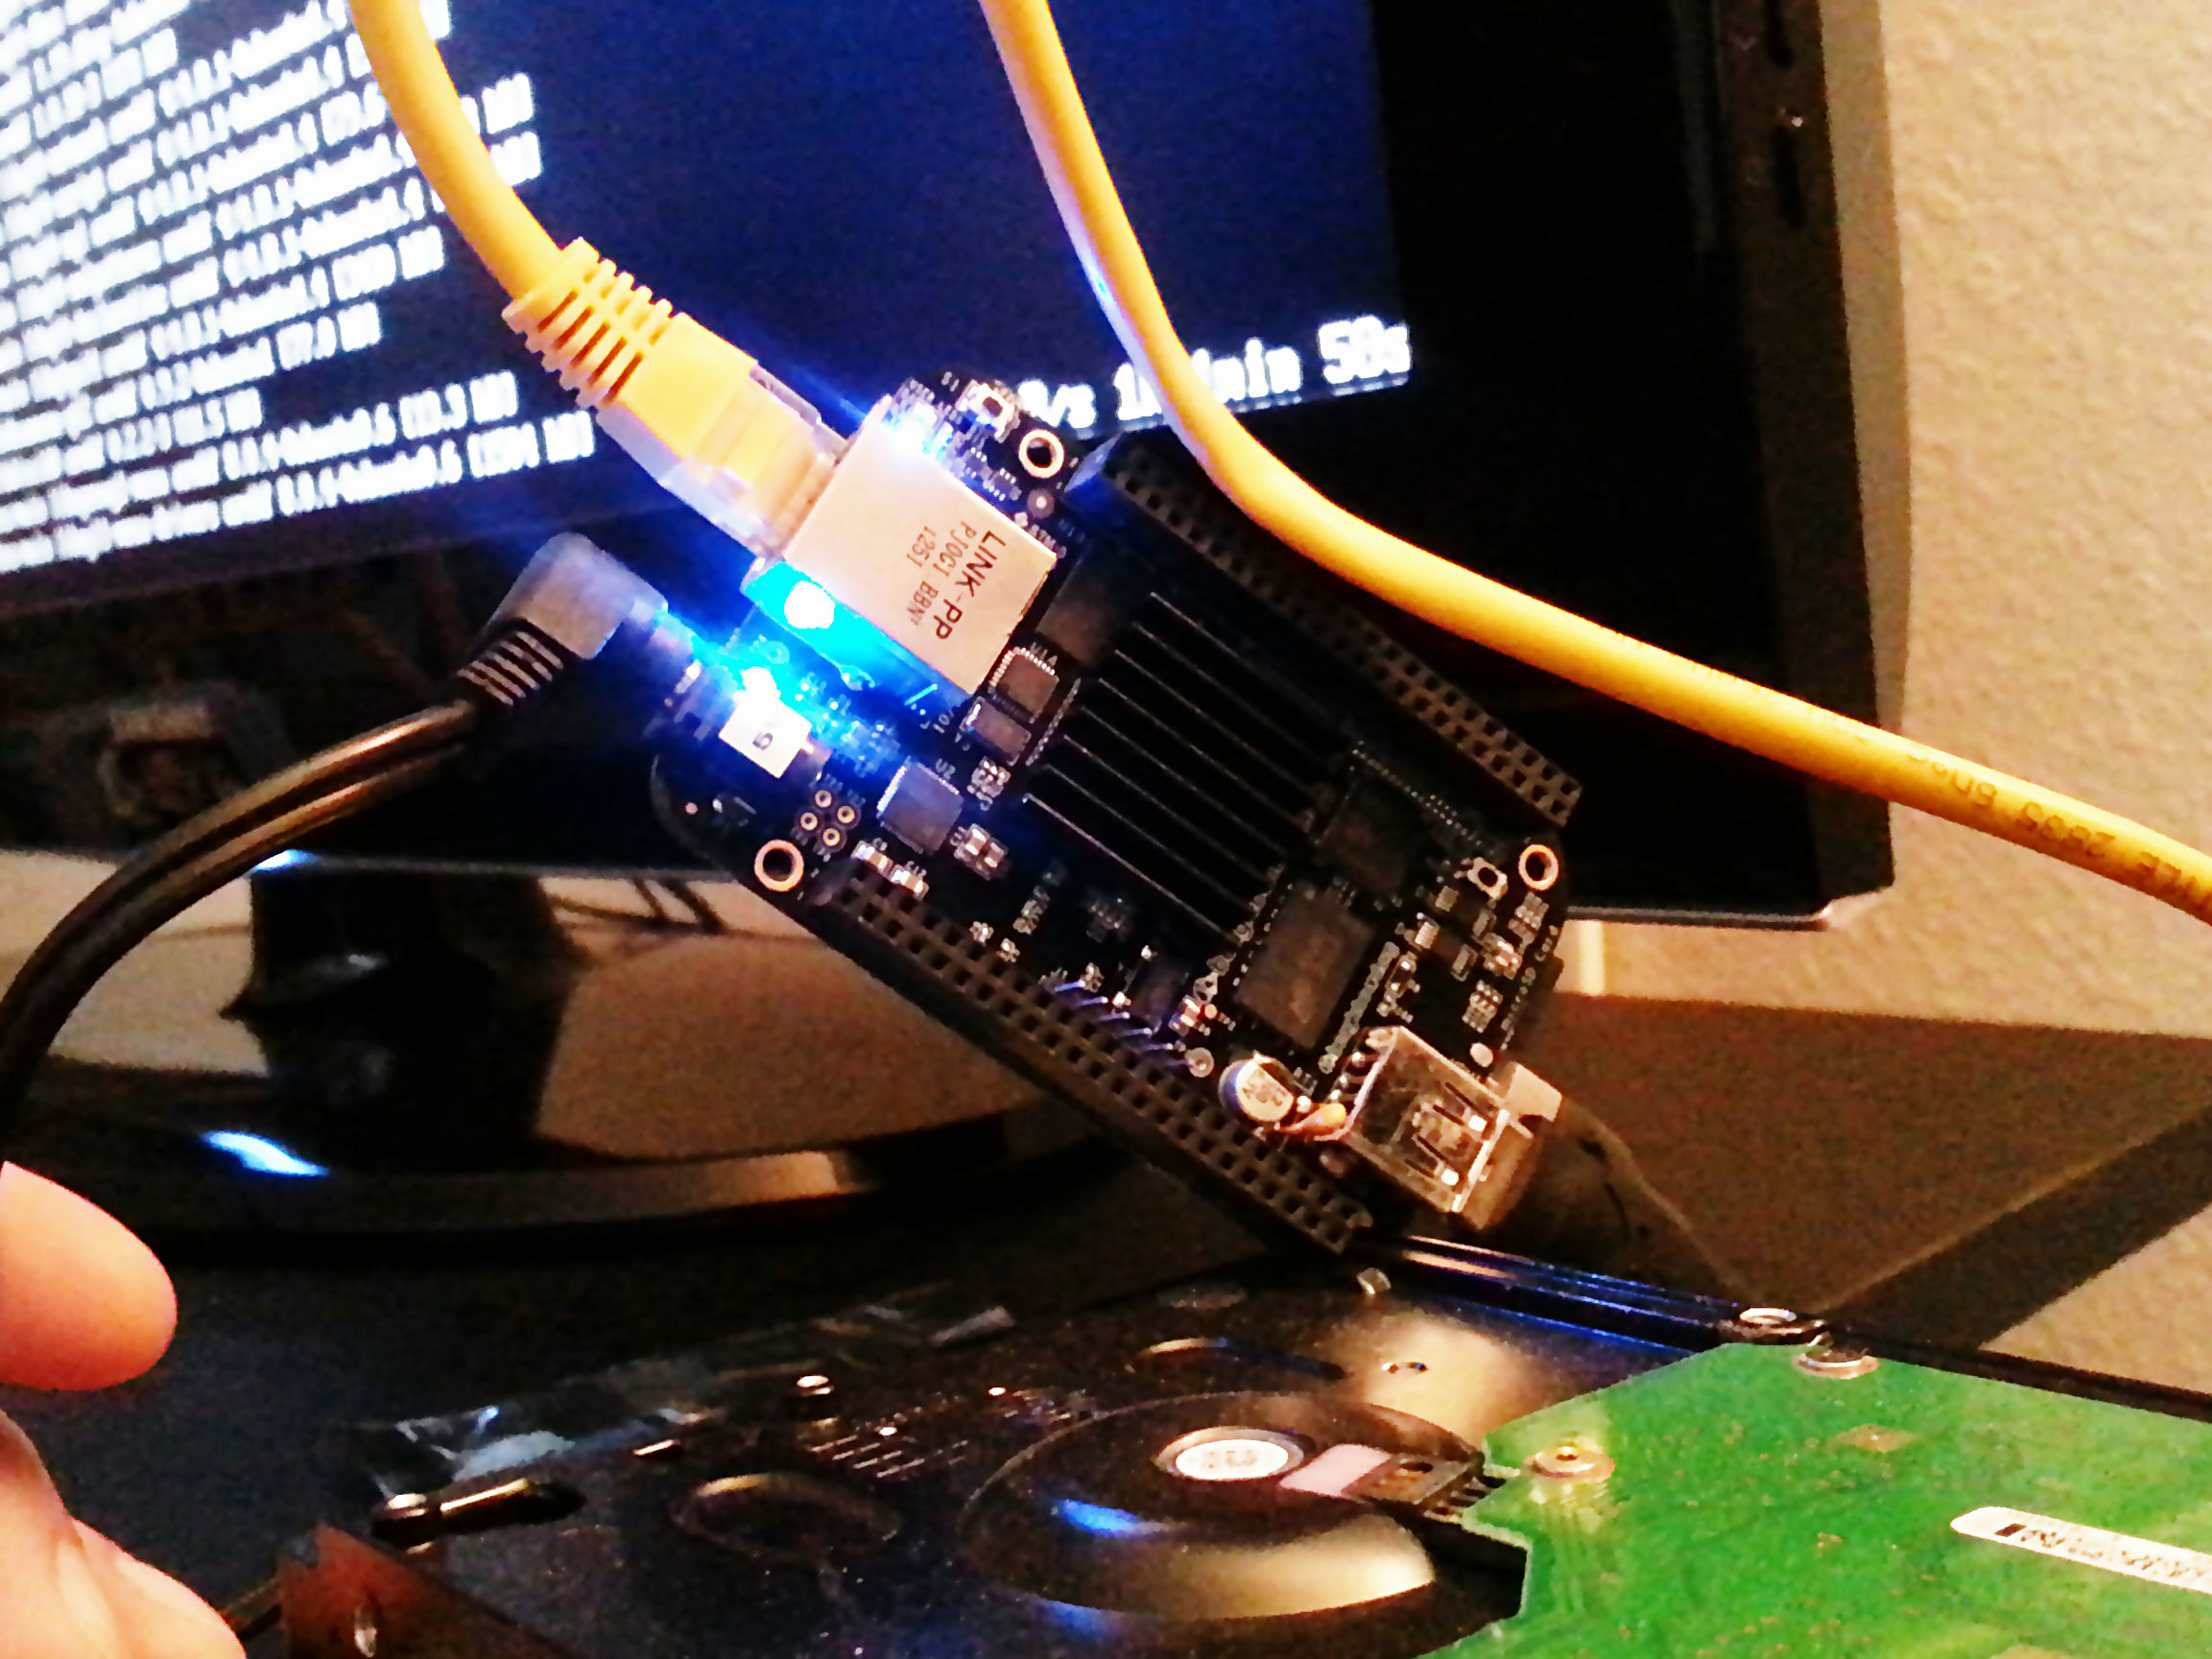
A single-board computer and an external hard drive are all the hardware you need to make your own cheap, high capacity version of Dropbox. I used a BeagleBone Black that I picked up for free at a trade show and an old 2 TB hard drive. The steps below detail my full procedure. Feel free to follow them and liberate yourself from expensive cloud storage services. Just be sure to back up your data!
Part One
Download and install Angstrom Linux on the BeagleBone Black.
To get started, download the latest image from beagleboard.org. I chose the eMMC version which flashes the OS to the built-in eMMC memory rather than running it off the SD card like a Raspberry Pi. The BeagleBone's eMMC memory is more robust than the flash memory inside a typical SD card and will last longer than an SD card after thousands of read/write cycles. If you're running a server that's constantly caching data and logging stuff, eMMC is the way to go.
Extract the Angstrom Linux image you downloaded using a tool like 7-Zip and write the image to a microSD card 4 GB or larger. Below is the procedure I used to write the image to my microSD card. This procedure can be followed by all Linux users.
First, find the microSD card block device path on your computer using lsblk. You should be able to identify your card by its size. Storage devices are enumerated by disk with each partition listed under the disk as branch. We're interested in the disk itself, not the partitions. My 4 GB microSD card was enumerated under the name "sdd" corresponding to the path "/dev/sdd".
NAME   MAJ:MIN RM   SIZE RO TYPE MOUNTPOINT
loop0    7:0    0   1.1G  1 loop /lib/live/mount/rootfs/filesystem.squashfs
sda      8:0    0 233.8G  0 disk
├─sda1   8:1    0   200M  0 part
├─sda2   8:2    0  55.9G  0 part
├─sda3   8:3    0   128M  0 part
├─sda4   8:4    0  55.9G  0 part
└─sda5   8:5    0 121.6G  0 part
sdb      8:16   1  14.5G  0 disk
├─sdb1   8:17   1     8G  0 part /lib/live/mount/medium
└─sdb2   8:18   1   6.5G  0 part
sdd      8:48   1   3.8G  0 disk
└─sdd1   8:49   1   3.8G  0 part
Unmount the microSD card, then write the Angstrom Linux image to it using the dd command. "if=" the location of the Linux image, and "of=" the device path for your microSD card. Be sure you specify the right device path. If you accidentally point this command to the wrong drive on your computer, it will overwrite the first 3.66 GB of data, destroy the partition table, and make the rest of the data inaccessible.
sudo dd bs=1m if=BBB-eMMC-flasher-2013.05.08.img of=/dev/sdd
Windows users can write the Linux image to the microSD card using the open source utility UNetbootin. Mac OS users can use the same dd command specified above after finding the device path with the command df -h.
Next, flash the Angstrom Linux image to the BeagleBone Black. With the device unplugged, insert the microSD card and hold down the "User Button" just above the microSD slot. Apply power to the device and keep holding the "User Button" until all four blue LED's next to the Ethernet port are illuminated. Release the button and wait while the LED's blink erratically. The eMMC is being flashed. This process will take 30 minutes or more. When the flashing process is complete, the device will restart and the four LED's will remain lit. Power off the device and remove the microSD card.
Part Two
Plug in an external hard drive and configure the OS to mount it automatically on startup.
Before you can play with your BeagleBone Black, make sure it's connected to your network via Ethernet and connected to your external hard drive. Power on the device. The device is accessible via SSH under the network name beaglebone.local. The default username is root with no default password (just press Enter). On Linux and Mac OS, open a terminal window and type this command to remotely access the BeagleBone:
ssh [email protected]
Windows users can use PuTTY for SSH access. You'll see this prompt when you've connected to the BeagleBone Black successfully:
root@beaglebone:~#
To ensure that your external hard drive mounts automatically each time you reboot your BeagleBone Black, you'll need to create an fstab entry. This is a three step process composed of (1) getting the UUID of your external hard drive, (2) making a directory to be used as a mount point, and (3) telling fstab to mount your hard drive to that directory using its UUID.
Step 1: Get the UUID of your external hard drive with the command ls -l /dev/disk/by-uuid. If the SD card is removed and there's only one hard drive connected (with a single partition), the hard drive will be the only disk with a path that doesn't begin with "../../mmcblk". In my case, it's "../../sda1" with the corresponding UUID "791768c2-9b12-4057-a378-894505f38879".
ls -l /dev/disk/by-uuid
total 0
lrwxrwxrwx 1 root root 15 Jan  1 00:00 5147-0D08 -> ../../mmcblk0p1
lrwxrwxrwx 1 root root 10 Jan  1 00:00 791768c2-9b12-4057-a378-894505f38879 -> ../../sda1
lrwxrwxrwx 1 root root 15 Jan  1 00:00 d75c6e2a-9c9c-4b4b-b5f9-c98d32ff1b4e -> ../../mmcblk0p2
Step 2: Make a directory to mount your external hard drive to. I'll call mine "Storage".
mkdir /media/Storage
Step 3: Tell fstab to mount your hard drive to that directory using its UUID. We'll do this using the "nano" text editing utility nano /etc/fstab. Navigate to the end of the file, then add the following line UUID=[UUID from Step 1] /media/Storage auto rw,user,auto 0 0. Press Ctrl+X to exit, Y to save changes, and Enter to overwrite the file. Your fstab configuration should look similar to the one below.
nano /etc/fstab

rootfs               /                    auto       defaults              1  1
proc                 /proc                proc       defaults              0  0
devpts               /dev/pts             devpts     mode=0620,gid=5       0  0
tmpfs                /tmp                 tmpfs      defaults              0  0
UUID=791768c2-9b12-4057-a378-894505f38879  /media/Storage  auto  rw,user,auto  0  0
Reboot your BeagleBone Black with the reboot command. Once it's back up and running, SSH into it and check that your drive is mounted with the ls command as shown below.
ssh [email protected]
[email protected]'s password:

ls /media/Storage/
Documents  Photos  Videos
Part Three
Install and configure the web server and PHP.
To run a web server on the BeagleBone Black we first need to disable the preinstalled "bonescript" service with the systemctl disable command. The "bonescript" service uses port 80 – the standard HTTP port – which we need for our own purposes. There are a few other services we don't need, so we'll disable them as well to free up resources. A reboot will ensure that everything is cleaned up. Below is a full list of commands to run.
systemctl disable bonescript.service
systemctl disable bonescript.socket
systemctl disable bonescript-autorun.service
systemctl disable cloud9.service
systemctl disable gdm.service
systemctl disable mpd.service
reboot
Reconnect to the BeagleBone Black through SSH. Now use the opkg update command to update the list of available packages. After updating, use opkg install lighttpd lighttpd-module-fastcgi to install the Lighttpd web server.
opkg update
opkg install lighttpd lighttpd-module-fastcgi
Check that the web server is up and running. Open a web browser on your computer and navigate to the URL "beaglebone.local". You should see a message claiming, "It works!"
/***********************/
/*   beaglbone.local   */
/***********************/

It works!
Now use opkg install php php-cgi php-cli to install PHP.
opkg install php php-cgi php-cli
Configure Lighttpd to use PHP. We'll do this by editing the Lighttpd configuration file located at "/etc/lighttpd.conf" using nano /etc/lighttpd.conf. Uncomment the line "mod_fastcgi" to enable it. Don't close the text editor.
nano /etc/lighttpd.conf

# lighttpd configuration file
#
# use it as a base for lighttpd 1.0.0 and above
#
# $Id: lighttpd.conf,v 1.7 2004/11/03 22:26:05 weigon Exp $

############ Options you really have to take care of ####################

## modules to load
# at least mod_access and mod_accesslog should be loaded
# all other module should only be loaded if really neccesary
# - saves some time
# - saves memory
server.modules              = (
#                               "mod_rewrite",
#                               "mod_redirect",
#                               "mod_alias",
                                "mod_access",
#                               "mod_cml",
#                               "mod_trigger_b4_dl",
#                               "mod_auth",
#                               "mod_status",
#                               "mod_setenv",
                                "mod_fastcgi",
#                               "mod_proxy",
#                               "mod_simple_vhost",
...
Scroll down to the "fastcgi module" configuration and uncomment the entire section starting from the line "fastcgi.server". PHP is installed at the location "/usr/bin/php-cgi" by default. Set “bin-path” to point to that location instead of "/usr/local/bin/php". Your new configuration should look like the example below.
#### fastcgi module
## read fastcgi.txt for more info
## for PHP don't forget to set cgi.fix_pathinfo = 1 in the php.ini
fastcgi.server             = ( ".php" =>
                               ( "localhost" =>
                                 (
                                   "socket" => "/tmp/php-fastcgi.socket",
                                   "bin-path" => "/usr/bin/php-cgi"
                                 )
                               )
                             )
Press Ctrl+X to exit, Y to save changes, and Enter to overwrite the file. reboot the BeagleBone Black and log back in via SSH.
Part Four
Download and install ownCloud.
There's no official ownCloud build for the BeagleBone Black, so we have to download the source code and unpack it ourselves. To get the source code, navigate to the ownCloud download page on your computer. Scroll down to the Tarball section, right-click on "Download Tar", and copy the download link. In your BeagleBone Black SSH terminal window type the command wget and paste the link you copied.
wget http://download.owncloud.org/community/owncloud-5.0.7.tar.bz2
Unpack the source code tarball using the command tar -xvjf [tarball] -C [target directory]. The "-x" parameter extracts files from the tarball, "-v" lists the files as they're extracted (verbose), and "-j" uses bzip2 to unpack the tarball. "-f" must be followed by the filename of the tarball and "-C" is followed by the target directory.
tar -xvjf owncloud-5.0.7.tar.bz2 -C /www/pages
Create a symlink to your external hard drive in the newly created ownCloud "data" directory using ln -s. This link will be a shortcut to the data on your hard drive inside the dropbox.
root@beaglebone:/home/debian/link# ln -s /media/Storage /www/pages/owncloud/data/Storage
Change the owner of the ownCloud direcotry to "www-data" using the command chown -R www-data:www-data /www/pages/owncloud. The "-R" parameter ensures the changes propagate recursively through all files and subdirectories.
chown -R www-data:www-data /www/pages/owncloud
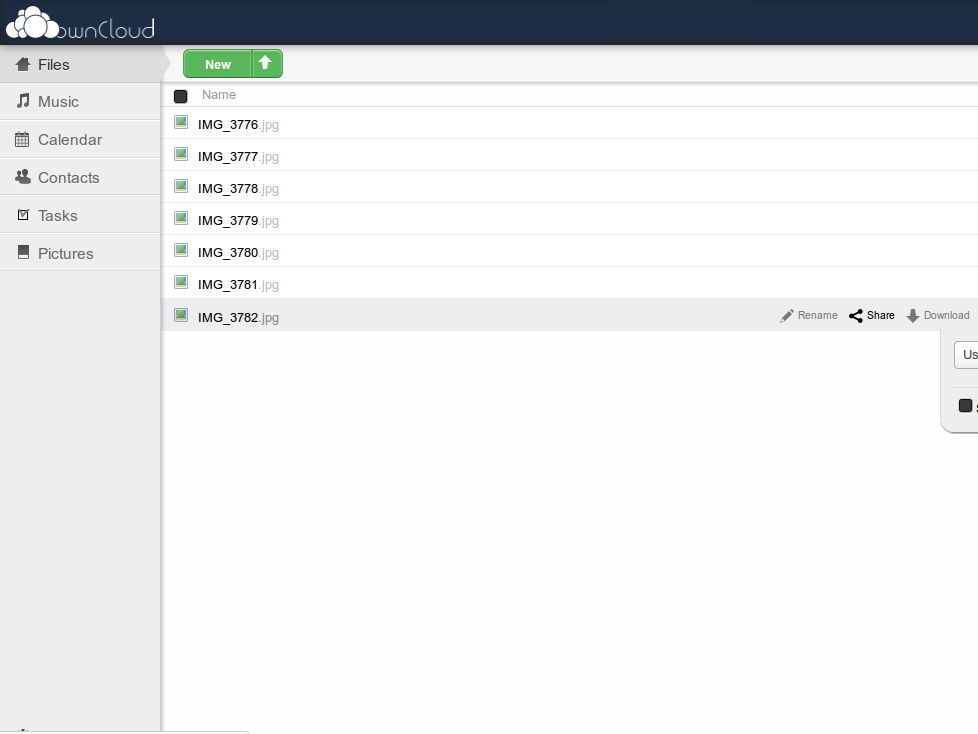
That's it! Go to the URL "beaglebone.local/owncloud" in your web browser to access your personal dropbox.
Part Five
Enable access from the internet.
At this stage the ownCloud dropbox can only be accessed from the local network. To access it from the outside world, you'll need to set up port forwarding on your home router. The process varies for each manufacturer, but I'll give a general overview of the steps. First, get the hardware MAC address of the Ethernet adapter on your BeagleBone Black. You can find it with the command ifconfig -a. Ethernet adapters are denoted as "eth0", "eth1", and so on. In the example below, the MAC address is "2A:40:E0:F4:C5:2A".
eth0      Link encap:Ethernet  HWaddr 2A:40:E0:F4:C5:2A
          inet addr:192.168.1.80  Bcast:192.168.1.255 Mask:255.255.255.0
          UP BROADCAST RUNNING MULTICAST  MTU:1492  Metric:1
          RX packets:112 errors:0 dropped:0 overruns:0 frame:0
          TX packets:59 errors:0 dropped:0 overruns:0 carrier:0
          collisions:0 txqueuelen:1000
          RX bytes:14645 (14.3 KiB)  TX bytes:11844 (11.5 KiB)

lo        Link encap:Local Loopback
          LOOPBACK  MTU:16436  Metric:1
          RX packets:0 errors:0 dropped:0 overruns:0 frame:0
          TX packets:0 errors:0 dropped:0 overruns:0 carrier:0
          collisions:0 txqueuelen:0
          RX bytes:0 (0.0 B)  TX bytes:0 (0.0 B)
Next, open a web browser and navigate to the URL of your router settings – commonly "192.168.1.1" or "10.10.10.1". If you've never logged in to change the default username and password, try one of common ones listed below.
Username: admin
Password: admin

Username: admin
Password: password

Username: admin
Password: (blank)
Once inside, look for a "Network Settings" button. Click it. Then find the page for setting a "Static IP Address". It may be under advanced settings. Create a static IP address for your BeagleBone Black using the MAC address you found earlier. The IP address can be anything as long as it's easy to remember. I like "192.168.1.80" because the server runs on Port 80. You may need to reboot your router for the settings to take effect.
After setting a static IP address, look for the "Firewall" settings button and find the page for setting up "Port Forwarding". Create a rule to forward Port 80 to your BeagleBone Black's static IP address. Your dropbox is now accessible from the internet. But, to find it you'll need to know the IP address your internet service provider (ISP) assigned your home network. That address should be listed on a network statistics page as your router's "Broadband IP Address" or similar.
With your router's IP address, you can finally access your dropbox from anywhere in the world! Just type the URL "[Your Router's IP Address]/owncloud" into a web browser.
However, this solution isn't ideal. Nobody wants to memorize the IP address for their home network, and more annoyingly, ISP's change that address constantly without telling you. Most make you pay to have a static IP address. There's a workaround.
Modern routers support a service called Dynamic DNS which keeps track of the IP address assigned by your ISP. If you own your own domain name, Dynamic DNS will automatically update the name server every time your IP address changes. Functionally, this means that you can access your dropbox using "your-own-personal-domain-name.org/owncloud" and forget about the ever changing IP address. A service called No-IP lets you create a personal domain name for free and link it to your home network through Dynamic DNS. Check your router user manual for details about setting up Dynamic DNS as the process varies widely.
License: CC BY-SA 4.0 Deed - You may copy, adapt, and use this work for any purpose, even commercial, but only if derivative works are distributed under the same license.
Category: Hardware, Software