Graphics Card Baking
November 13, 2010
Overview
Baking a broken laptop graphics card in the oven to repair fractured solder joints.
Gallery
Details
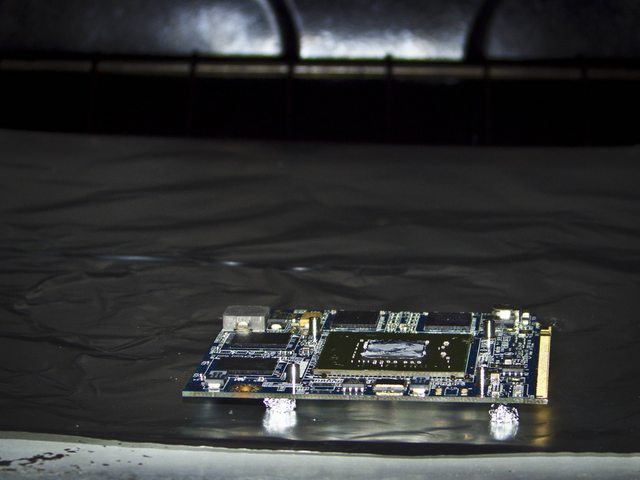
The graphics card in my laptop died last weekend out of warranty. After a quick Google, I learned the failure was likely the result of fractures in the tiny beads of solder that connect the GPU to the circuit board. This failure mode is common in electronics produced between 2007 and 2009 when RoHS compliance led manufactures to use a less malleable, poorly tested form of solder in place of more malleable, lead-based solder. Thermal stress, exacerbated by the fact that the temperature in my cheap college bedroom climbed to over 90°F every day last summer, caused the GPU solder joints to fracture. Eventually they lost enough electrical conductivity that the card couldn't compensate for it.
Solution? Baking. Electronics manufacturers attach tiny components to the circuit board by depositing a small amount of solder paste on the connections to be soldered. Next, they place the components on top of the solder paste and bake the board in an expensive oven, which melts the solder and permanently affixes the components to the board – a process called "reflow soldering." Using the principles of reflow soldering, the People's Republic of the Internet has found that baking dead graphics cards in a conventional oven at 385°F for 8-10 minutes can melt the fractured solder joints, fill in the cracks, and get the card back in working order. It's a temporary solution since additional baking further hardens the solder, but it gets the job done.
Because the 385°F degree mark on my 1950's gas oven really means 385 +? degrees, I set the thing to 365°F and hoped for the best. After giving the oven ample time to heat up, I popped in the graphics card and stood by until I could smell the sweet, carcinogenic fumes of molten solder. I pulled the card out once the smell was a little stronger than "barely noticeable" and let it cool for the next hour. Finally, with no real expectation that this process would be successful, I popped it back into my laptop. Voila! Working graphics card.
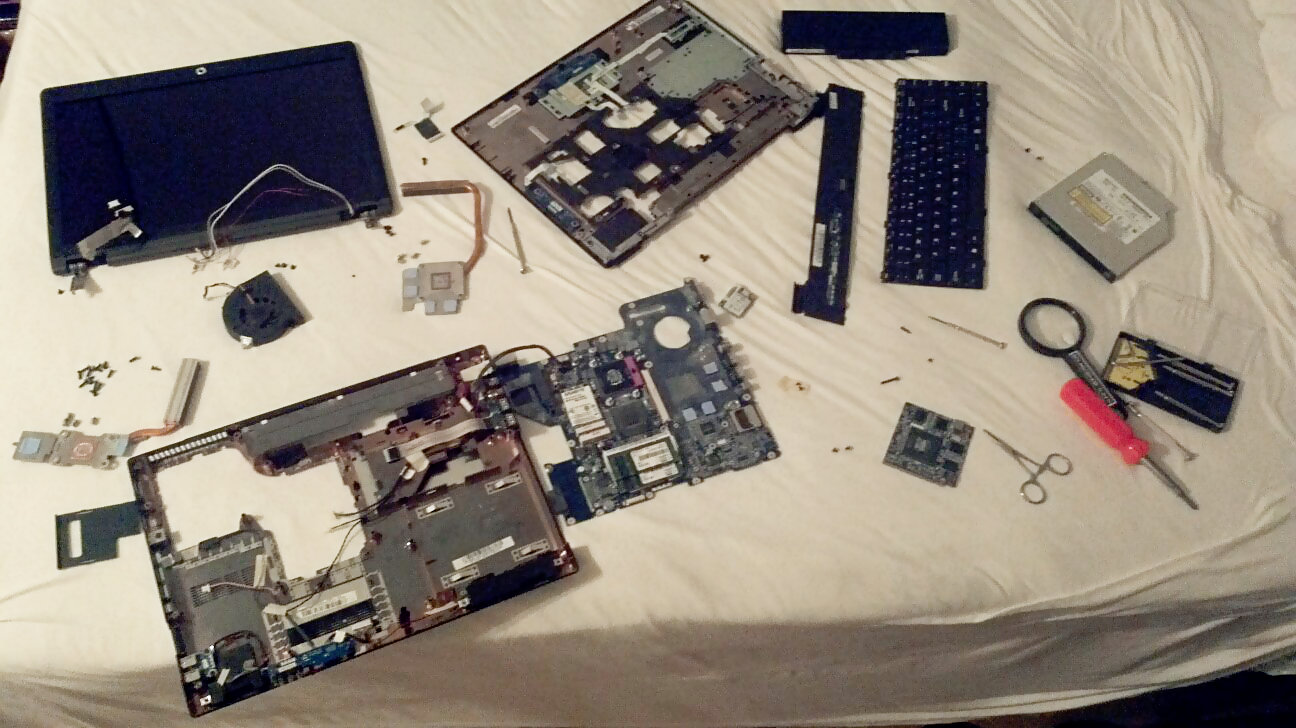
It's worth noting that the most difficult part of this venture by far wasn't fixing the graphics card, but getting to the thing. I spent three hours trying to figure out where the card was hidden inside my laptop and getting to it. Compal designed my laptop in such a way that everything must be disconnected from the motherboard and removed before you can even access the card.
License: CC BY-SA 4.0 Deed - You may copy, adapt, and use this work for any purpose, even commercial, but only if derivative works are distributed under the same license.
Category: Hardware